This is part of our ongoing Seoul travel guide series — if you haven’t already, check out our posts on taking the limousine bus in from Incheon Airport and tax-free shopping at Olive Young and SPAO.
Before you worry about what to see or eat in Seoul, there are two things worth sorting out before you even land: how you’ll get 데이터 (deiteo), data, and how you’ll get around. Get these two right and the rest of your trip runs a lot smoother. Here’s exactly what to set up — every app and recommendation below is what actually worked for us (the Byte SIM link includes our affiliate code, but the recommendation itself isn’t paid placement).
eSIM: skip the airport kiosk line
An eSIM is a digital 유심 (yusim), SIM card — no physical chip to pick up, swap, or lose. You buy it, install it on your phone before you leave home, and switch it on the moment you land. That’s it.
Why I’d recommend this over renting a pocket wifi:
- No kiosk line at the airport, no deposit to pay, no device to pick up or return
- Nothing extra to carry, charge, or worry about losing
- You can set it up entirely before you leave home, so you land already connected
Pocket wifi does have its place — if you’re travelling as a group and want to share one connection across several devices, or if your phone isn’t eSIM-compatible, it can still make sense. But for solo or couple travel, eSIM is far less hassle.
How I set mine up (using Byte SIM):
- Download the app
- Search for Korea
- Choose your trip duration
- Choose how much data (GB) you want
- Check out
- Install the eSIM on your phone before you fly
- Once you land, turn it on — it connects to the local network automatically
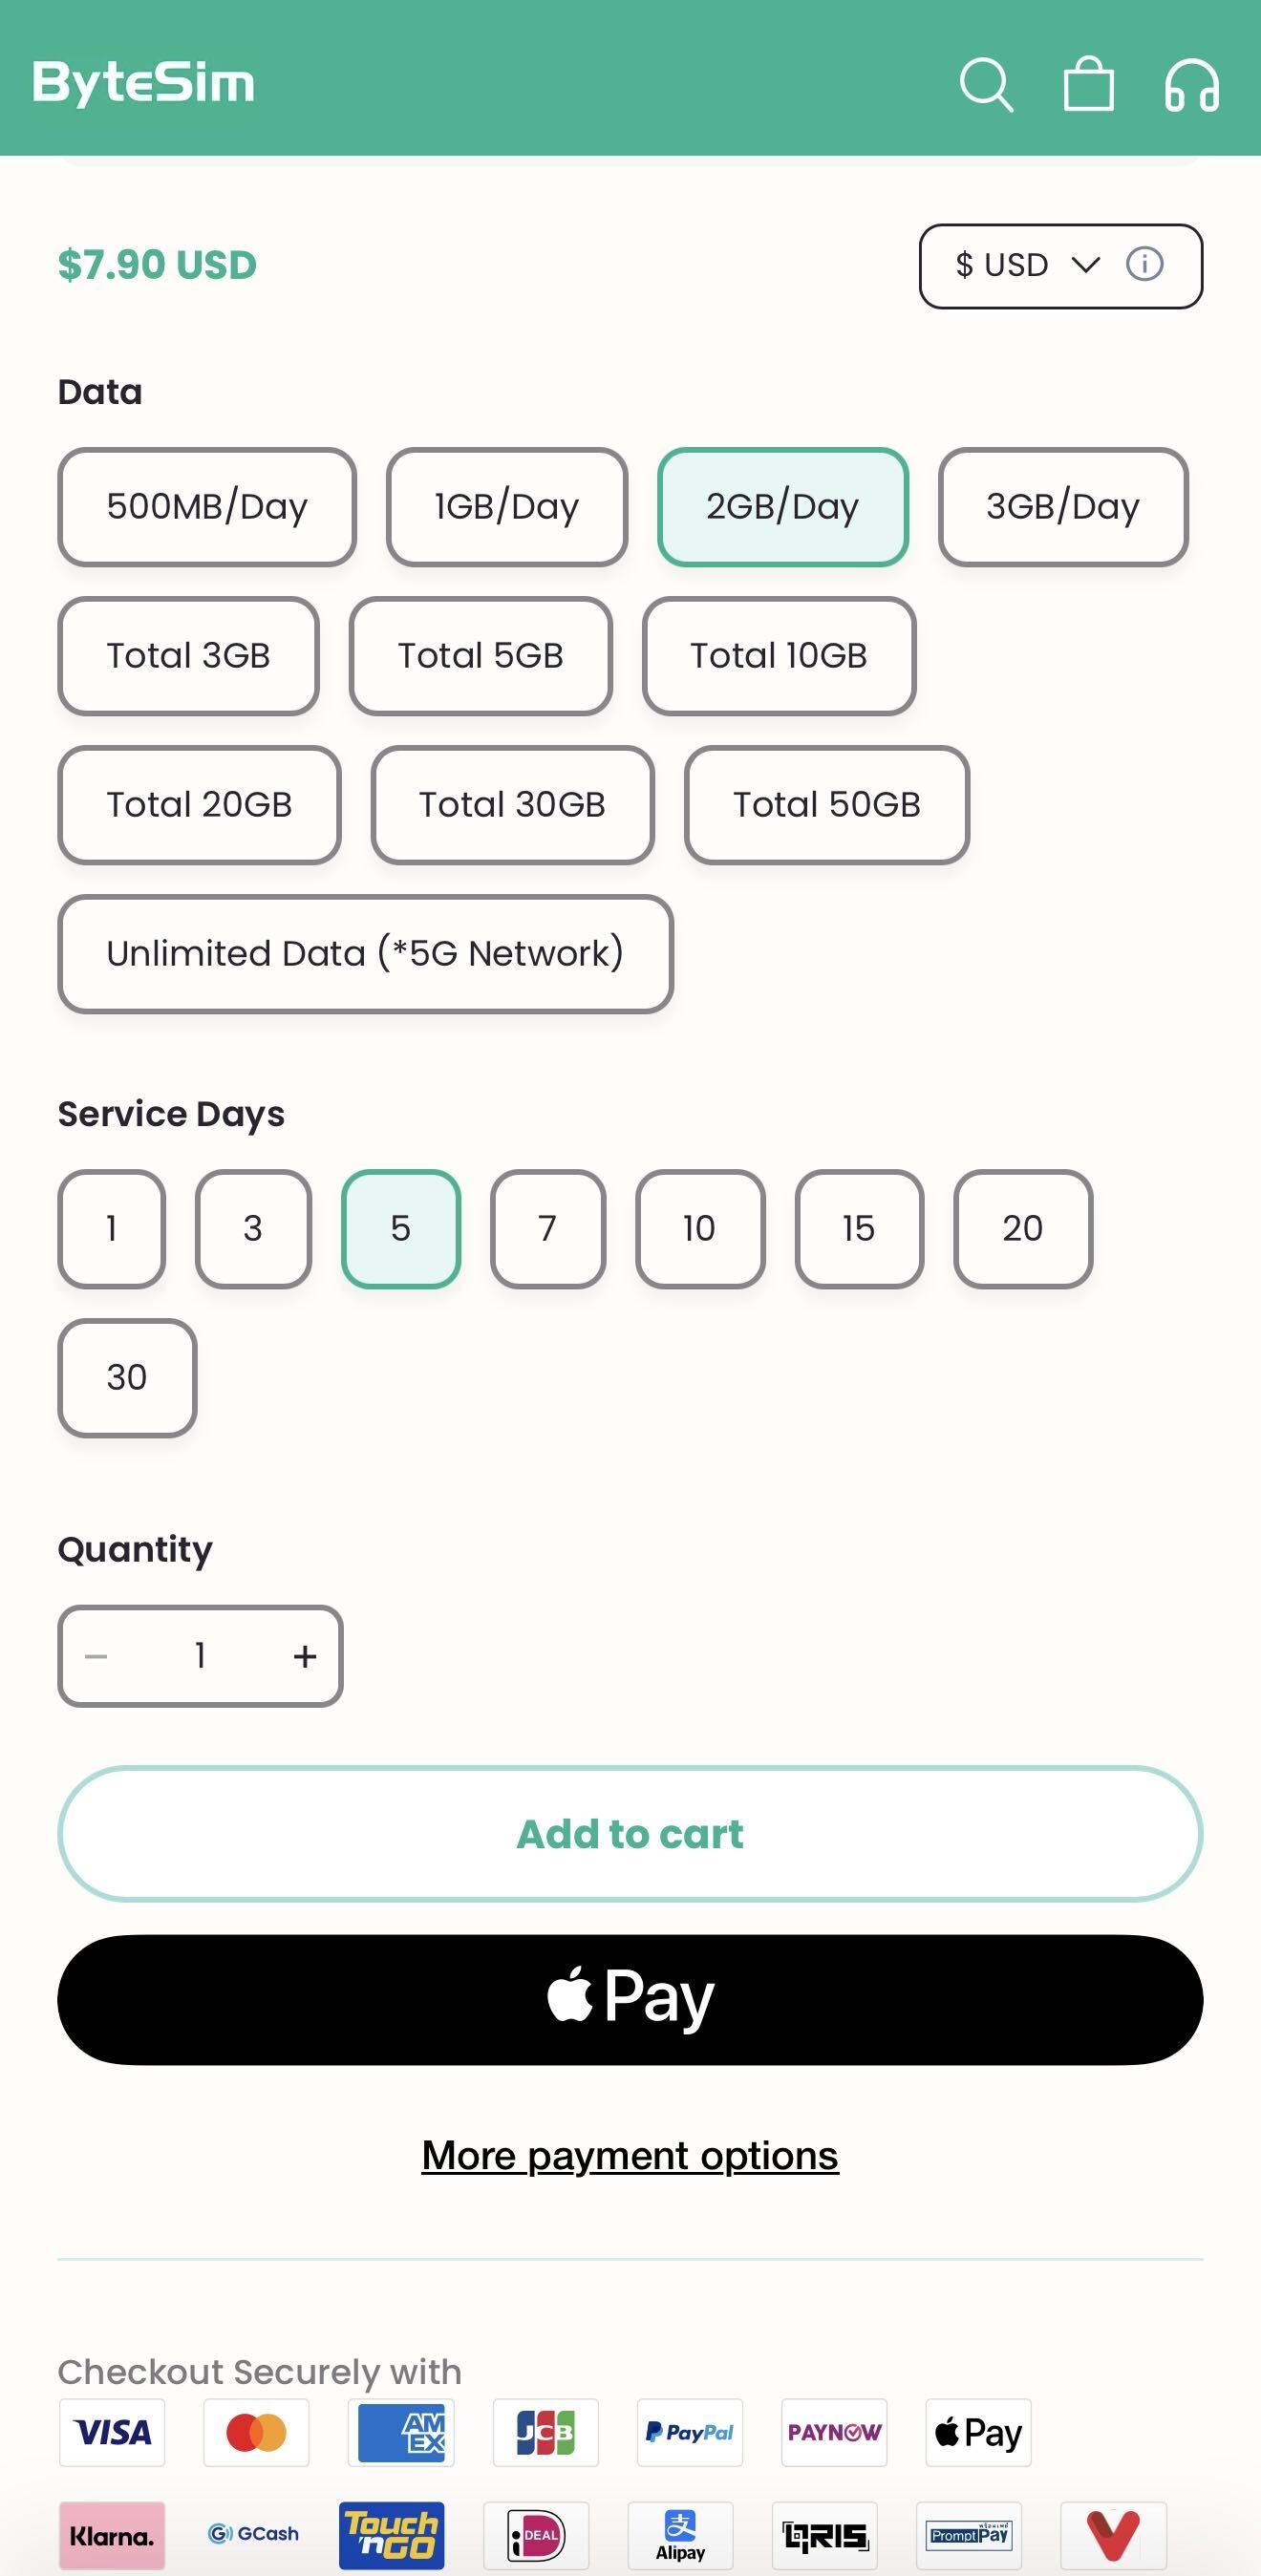
My honest take on Byte SIM: it’s genuinely what I use. It’s cheap — a 2GB/day plan for 5 days runs about $7.90 USD — and I’ve had zero connection issues anywhere I’ve used it in Korea. Once it’s installed, it just shows up under “My eSIM” in the app so you can check your plan or reinstall it without digging through phone settings.
One thing to check first: make sure your phone actually supports eSIM before you buy — most phones from the last few years do, but it’s worth a quick check in your settings.
Navigation apps: why Google Maps isn’t enough here
Here’s something worth knowing before you land: Google Maps still doesn’t work well for actual navigation in Korea. South Korea has long restricted the export of high-precision map data over security concerns, and while the government conditionally approved Google’s request to export that data back in February 2026, the functionality still hasn’t caught up — as of now, Google Maps still can’t reliably give turn-by-turn walking or driving directions in Korea, and business listings are often outdated.
That doesn’t mean Google Maps is useless — it’s still fine for searching places and reading reviews. Just don’t rely on it to actually get you somewhere.
The app to actually navigate with: Naver Map
This is the one my Korean husband swears by, and it’s the local standard for a reason:
- Accurate walking and transit 길찾기 (gilchatgi), directions, including subway exits and real-time bus tracking
- Full English interface, so there’s no translation stress
- Easy to set up and navigate even if it’s your first time using it
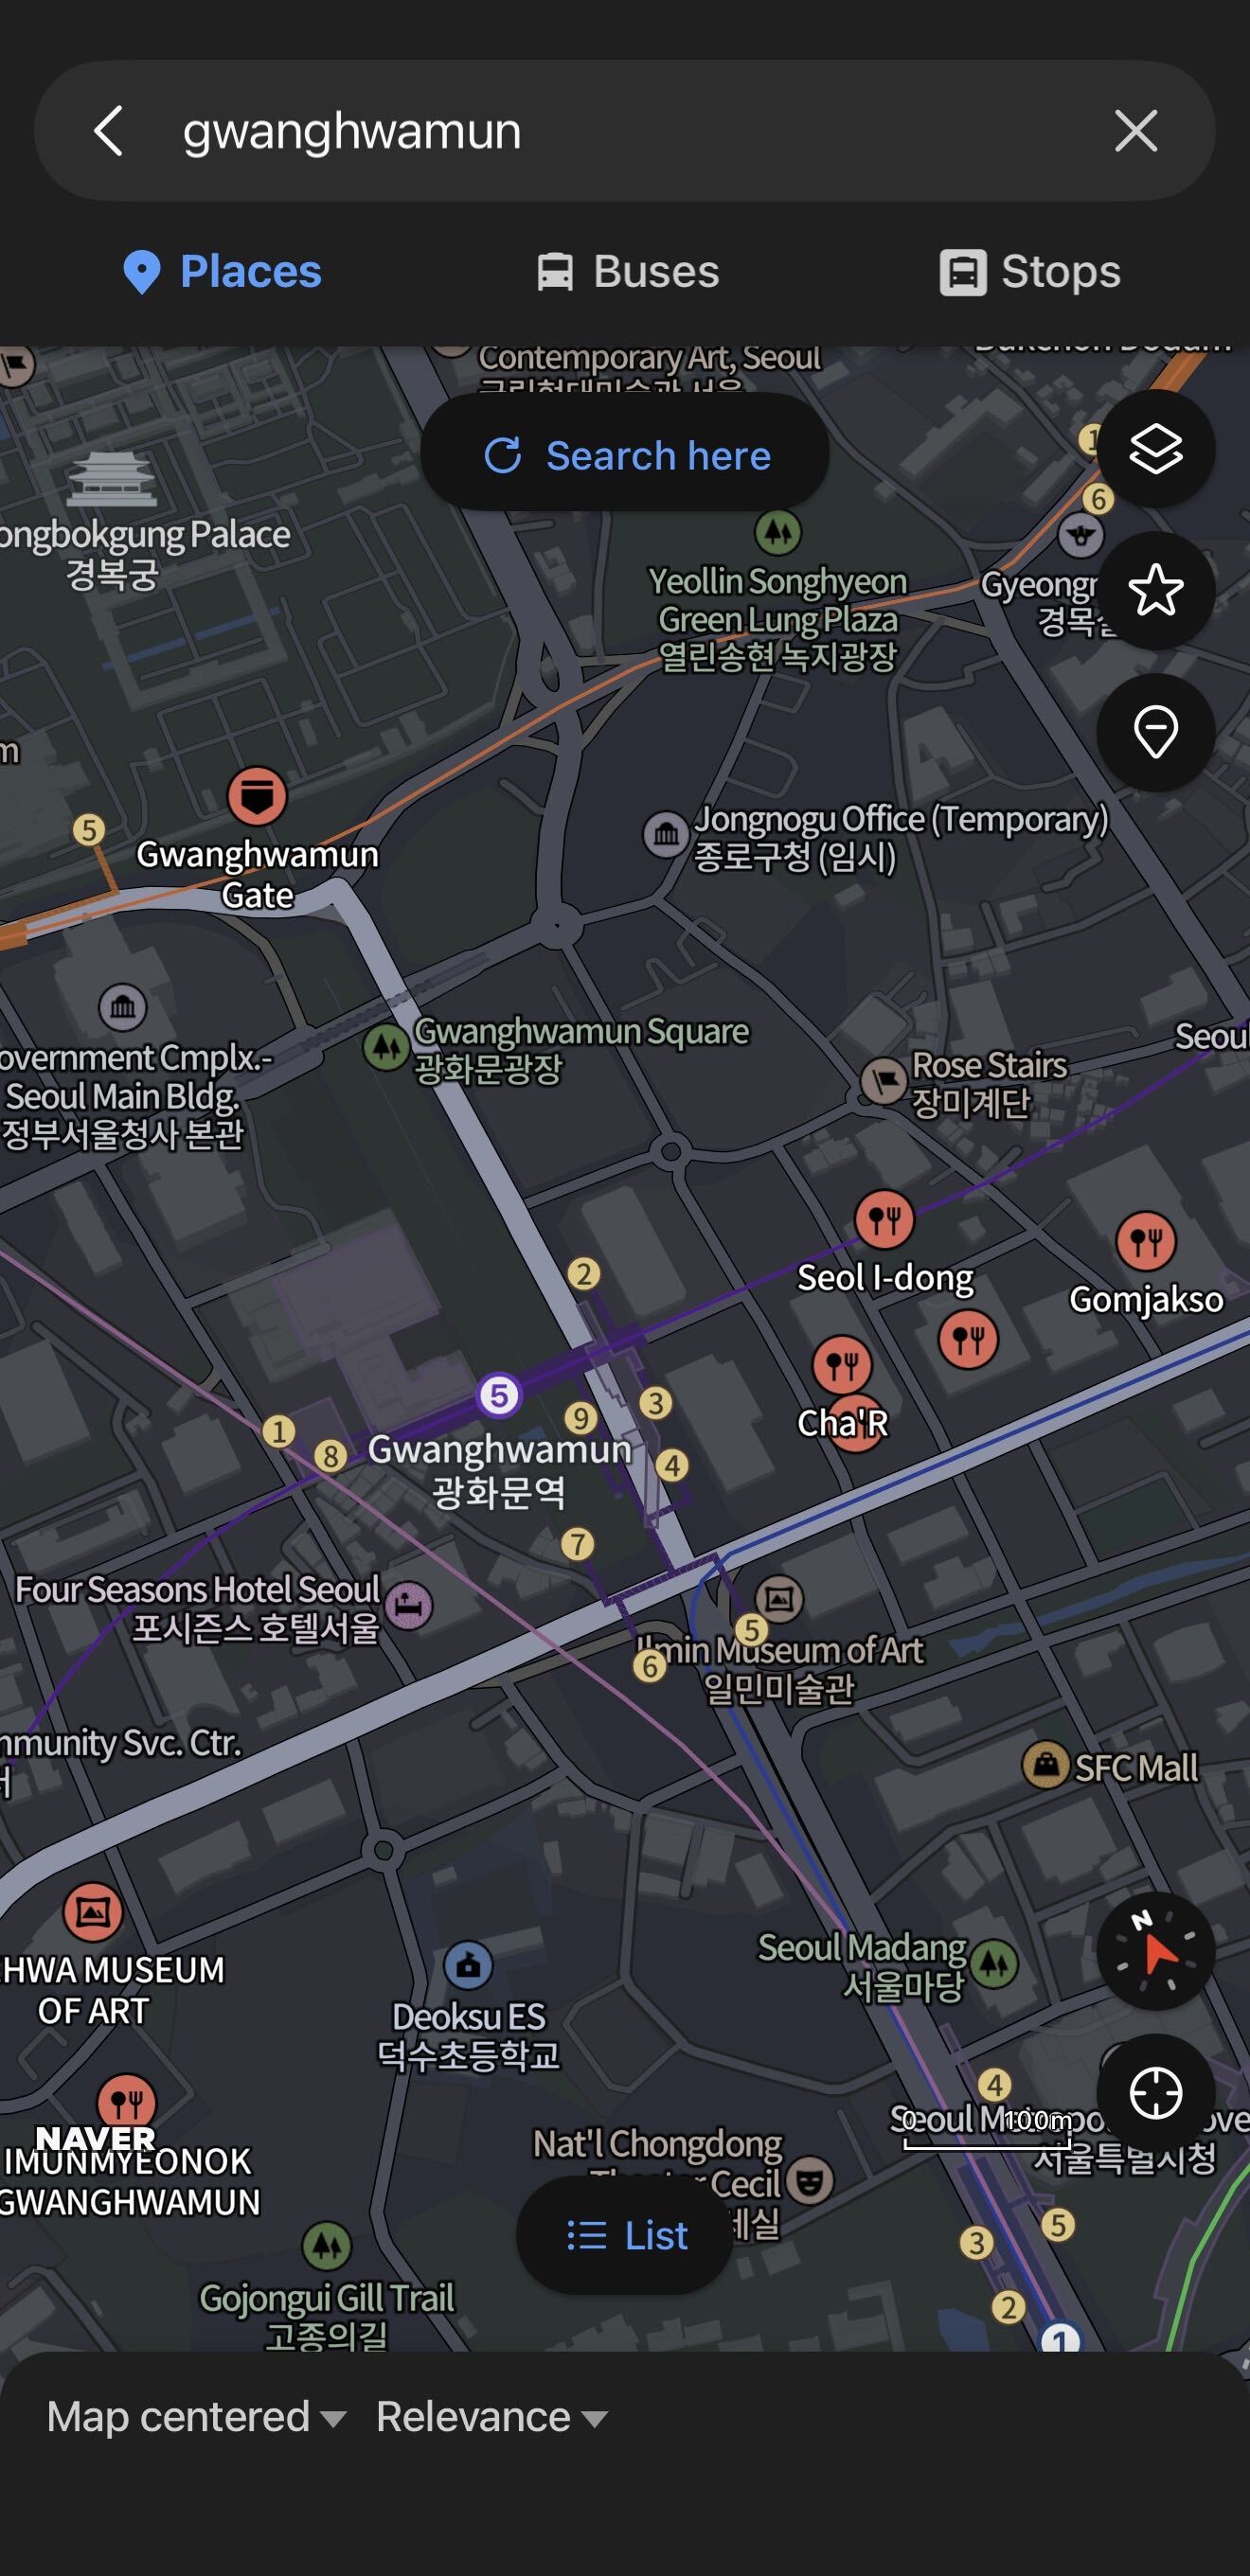
The interface itself is what sold me — it’s genuinely intuitive even on a first use. Search a place like “Gwanghwamun” and you get tabs to filter between Places, Buses, and Stops, with every result labeled in both English and Korean so you’re never guessing which pin is which. Subway exits are numbered right on the map, restaurants and landmarks are colour-coded by category, and a “Search here” button lets you re-center results as you pan around — small touches, but they add up to an app that doesn’t fight you.
Bonus app: Kakao T (or really, K.RIDE)
My husband is Korean, and Kakao T is what he’s always used to order a 택시 (taeksi), taxi, so it’s what he told me to download too. Once I actually opened it, though, it didn’t fully make sense for me — it’s built around logging in with a Kakao account, which is the normal path for a Korean resident but not exactly a smooth one for a tourist.
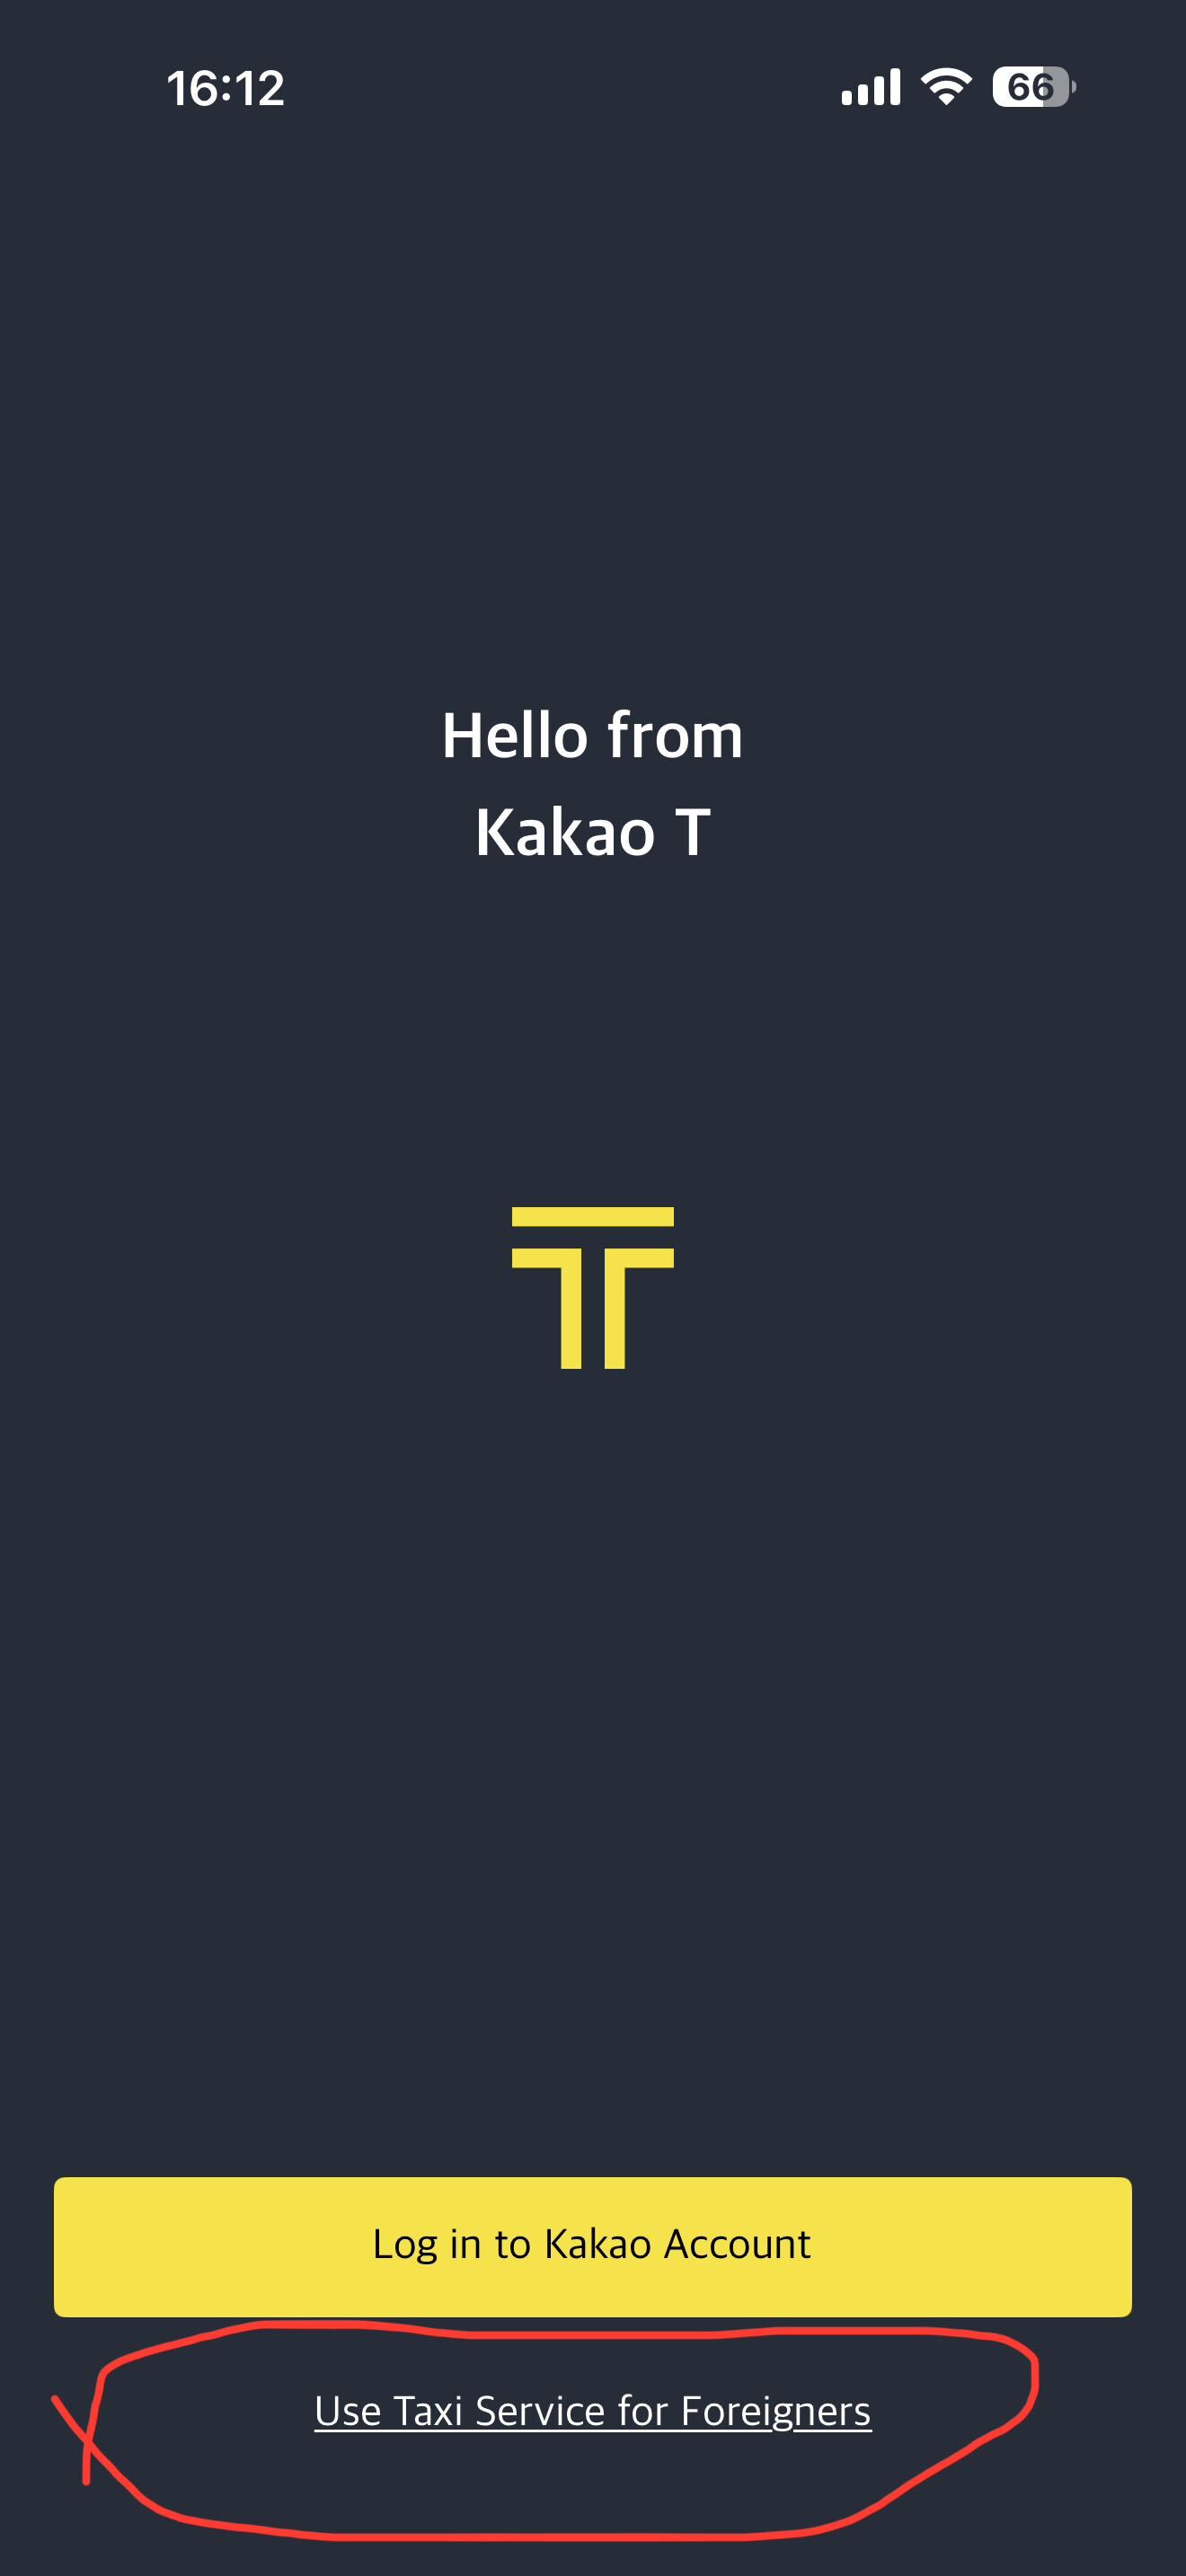
Look closer at that login screen and there’s a small, easy-to-miss link at the bottom: “Use Taxi Service for Foreigners.” Tap that instead, and it hands you off to a separate app called K.RIDE (powered by Kakao Mobility), built specifically to help tourists book taxis without needing to set up a full Kakao account first. That’s the one to actually use.

Recap
Set up your eSIM before you fly, download Naver Map for getting around once you land, and keep Kakao T on hand for taxis. With those three sorted, you’re ready for the next piece: actually getting around the city — subway, bus, taxi, and bikes, covered in our Seoul transportation guide.